Microblading The Cleanest Strokes
Achieving crisp, clean hair strokes is every PMU artist’s dream. However, the reality of our healed results often falls short of our expectations when the client walks through the door. The key to obtaining those crisp, healed hair strokes lies in minimizing skin disruption. By skillfully implanting pigment with precision, you can minimize trauma, and finally achieve clean and neat healing.
Here are some essential tips to ensure your microbladed strokes heal with optimal clarity:
1. Stretch and flatten the skin with a 3-point stretch

Tina demonstrating the 3-point stretch technique while using the 9 Classic Microblade
Imagine trying to draw a straight line on a wrinkled, loose surface compared to one that is smooth and tight. It makes a world of difference! A good stretch forces the skin to be smooth and flat so you can make a clean stroke as you microblade. Trying to work on skin that is lax will result in patchy and wobbly lines.
Make sure to utilize a taut 3-point stretch.
- Flatten the skin in 3 opposing directions at once in a triangle formation.
- Use both your stretching hand (your non-dominant hand without the microblade) and your working hand (your dominant hand which holds the microblade.
- Your stretching hand should be placed along the client’s forehead.
- Pin the skin down and spread it apart in small, taut sections.
- The pinky of your working hand must stretch in an opposing direction to complete the stretch.
Remember, when the skin is flat and void of wrinkles, your microblade can glide through the skin smoothly for clean strokes.
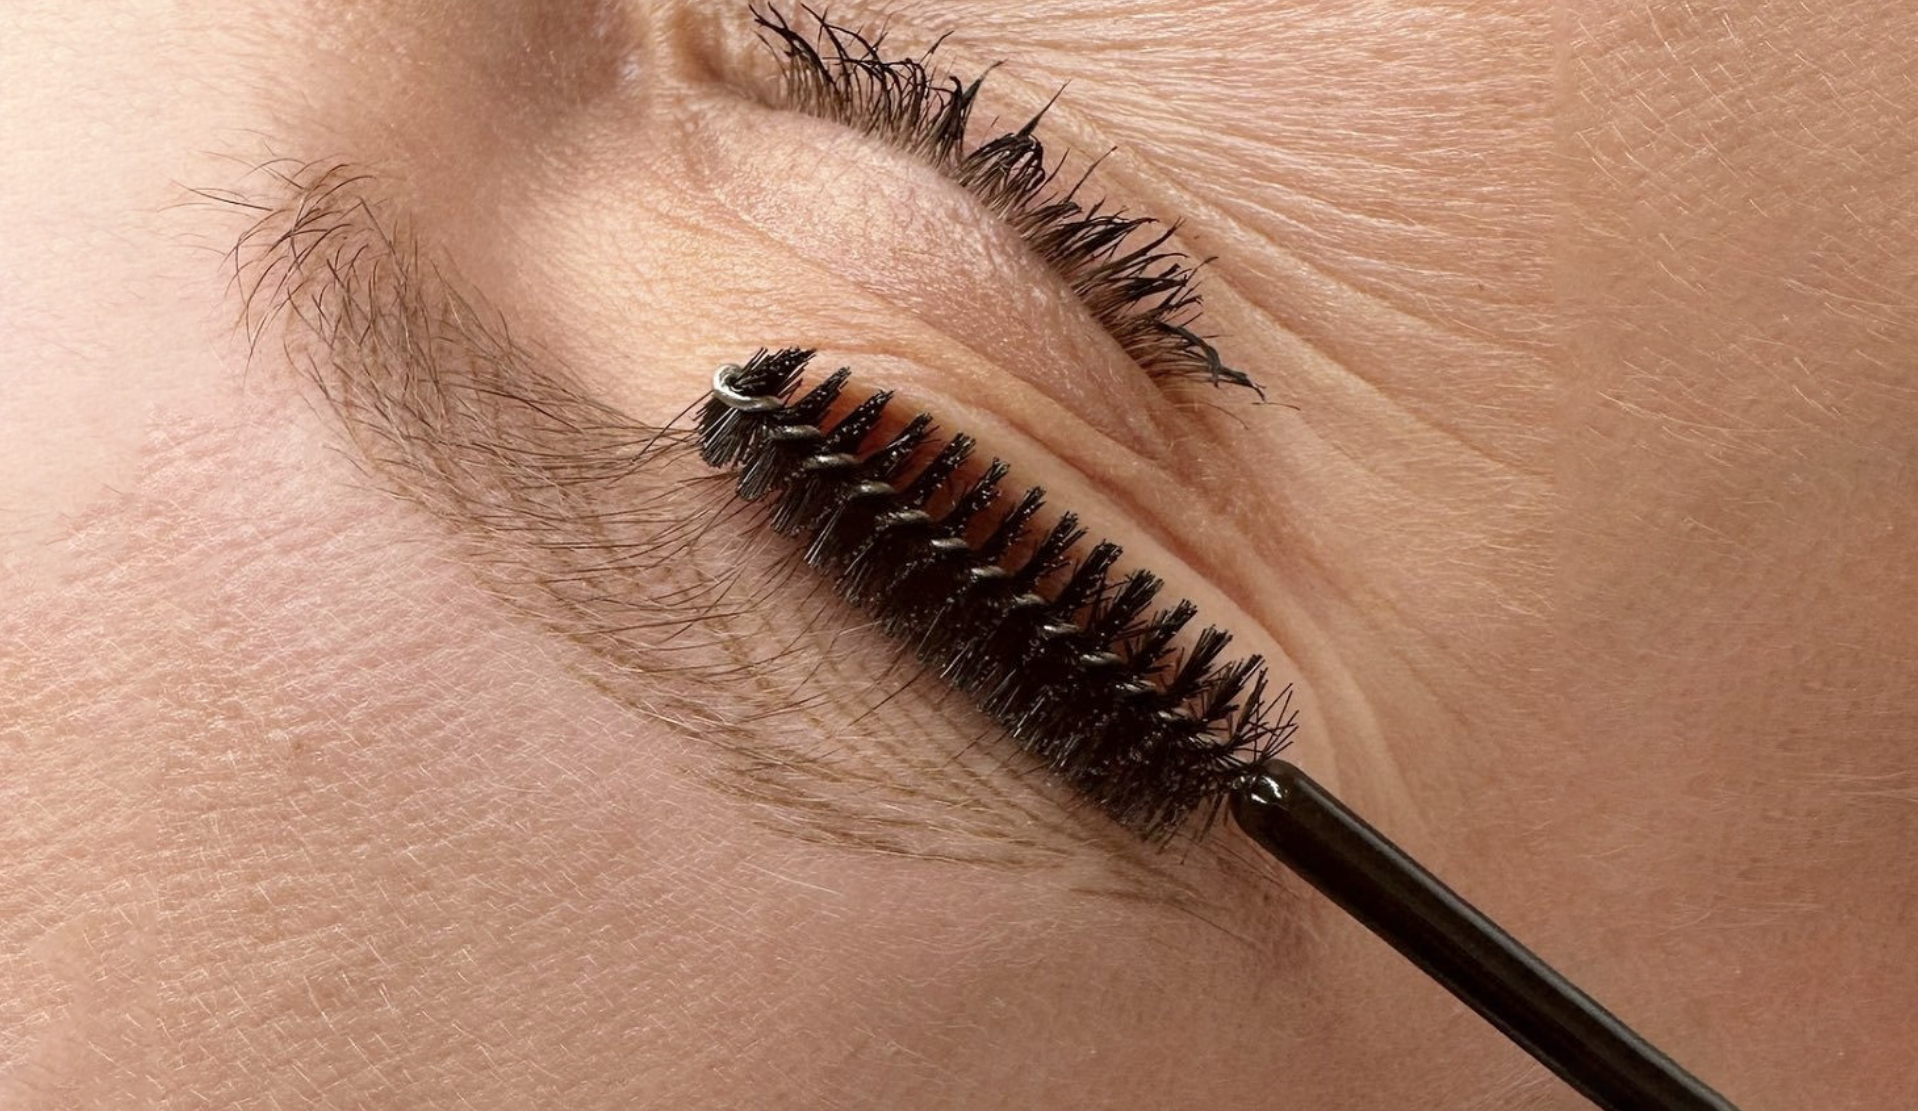
2. Maintain a 90-degree angle

Tina microblading with the proper angle using our 14 Curved Microblade
Imagine trying to cut a piece of paper with your scissors at an angle - it’s not very effective. Microblading is similar. Artists must pay close attention to the angle at which the blade enters the skin. The needles MUST enter in an upright position and NOT at an angle. Focus on that blade-to-skin angle, readjusting your sitting position and your client’s head as necessary to maintain 90 degrees to the skin for every new section. You do not need to pay attention to the angle of the handle or the angle of the blade in relation to the ground. As long as your blade is 90 degrees from each section of skin you are working, your strokes will enter properly.
If you look at the profile of a high-quality microblading hair stroke, you will see that the needle penetrates the skin at a 90-degree angle to the skin with good contact of the needles touching down on the skin, without the blade leaning to either side. If you are not penetrating the skin at a perpendicular angle, the quality of the hair stroke will be compromised and the hair strokes will be fuzzy.
Think of your microblade like an ice skate and keep it upright for perfect form - even when practicing!

Tina demonstrating the perfect angle using our U Needle Microblade
3. Microblade to the sweet spot

Depth is critical for successful results because if you implant the pigment too shallow, you will only land in the epidermis and the color won’t remain once healed. However, if you go too deep, you can cause scarring and the color will heal too cool or ashy. So, how do you figure out the perfect depth?
The truth is, this can be very tricky since not only does every client have a different skin thickness, but this thickness will even vary throughout the brow itself. Generally, the skin will be much thinner at the tail of the brows than at the bulb of the brow.
In order for the pigment to stay in place and heal true-to-color, you’ll need to microblade to the upper dermis, but not further. A telltale sign that you’ve hit the upper dermis, or the “sweet spot,” is when you see a slight channel in the skin, oftentimes marked by pinpoint bleeding.
When microblading, I will make my first stroke with very light pressure to test the skin, creating a shallow channel. This will allow me to assess the thinness or thickness of the client’s skin. After wiping, I can stretch the skin to gauge the depth of this first pass, so that I can adjust accordingly. If the stroke looks too shallow, I will trace it again precisely to reach that sweet spot and to implant more pigment into the stroke. If the first pass did indeed reach the sweet spot, I will allow my blade to fall into that channel and trace it very gently to implant more pigment, being careful not to add pressure or go deeper. I make sure not to exceed 2-3 passes total per stroke.
Your depth should look like shallow paper cuts, not deep cuts.

Checking for the “sweet spot” as shown by Tina Davies using the U Needle Microblade
4. Choose the right pigment colors
Hair strokes done with microblading are basically a concentrated fine line of color (think eyeliner) instead of a dispersion of color that is created with a powdered/ombre technique (think eyeshadow). This is why microblading is sometimes referred to as a “high-saturation technique”.
When a color is dense and concentrated, it has a tendency to appear cooler and less transparent, so you’ll want to always choose warmer colors when microblading to prevent your healed results from ashing out or looking bluish-grey. Since all colors will naturally cool down healing, you can expect warmer colors to heal to a neutral color outcome, while neutral to cool colors will heal even cooler.
With the FADE Eyebrow Pigment Collection, the warmer colors are: Light Warm Blonde, Medium Warm Brown, Medium Warm Auburn, and Dark Warm Brown, as indicated in both the name and by our temperature icons. Keep in mind that Medium Warm Auburn can also be used to add extra warmth to any other color in the FADE pigment line.

In the I ❤️ INK Brow Collection and I ❤️ INK Brow Collection LUXE, the warmer colors are: Blonde, Medium Brown, and Dark Brown, as indicated in the undertone section.

Achieving those flawless, healed hair strokes may not be easy, but it is possible when you utilize these key tips. Adhere to the above principles, and watch your results become squeaky clean!
Check out some healed results below.
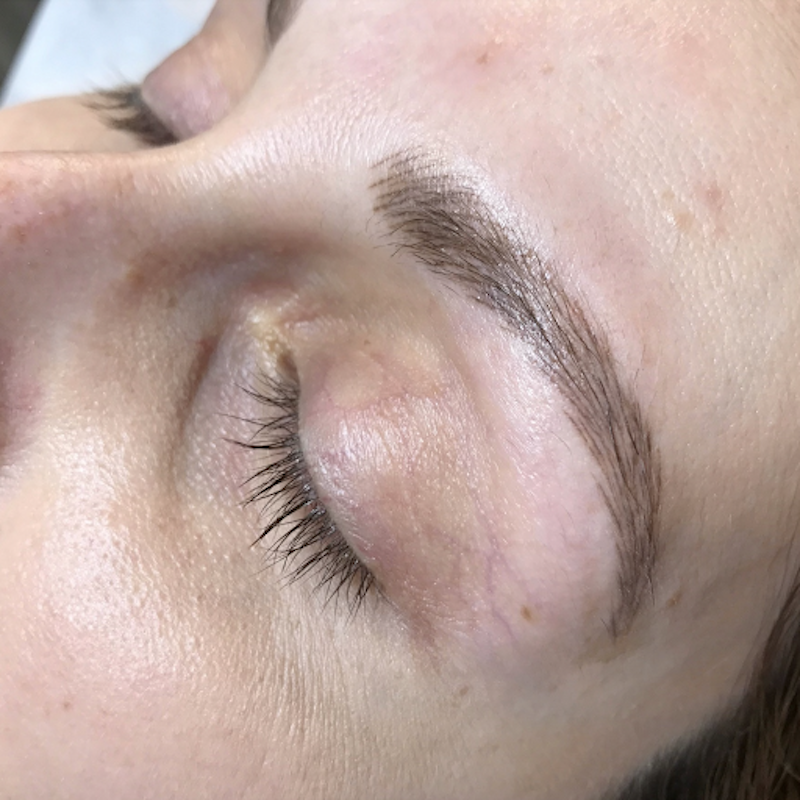
Healed microblading using FADE pigment in Medium Warm Brown by Tina Davies

 Healed microblading using FADE pigment in Dark Warm Brown by PRO Team artist Shalyn (@highbrowboston)


Healed microblading using FADE pigment in Dark Warm Brown with our 18 U Nano Microblade by PRO Team artist Helen (@thebrowclinicwinchester)
 Healed microblading using Sunset pigment in Toffee by PRO Team artist, Helen (@thebrowclinicwinchester)


Healed microblading using I ❤️ INK pigment in Dark Brown by PRO Team artist Leanne (@leannemacedobrowstudio)

Healed microblading with I ❤️ INK pigments in Blonde & Medium Brown by PRO Team artist Lindsay (@michianamicroblading)


If you’re a newly-certified permanent makeup artist looking to invest in yourself and elevate your brow skills, this online course on The Collective is for you. You’ll learn my signature Blade and Shade technique which gives clients both the realism of fluffy, natural hair strokes along with extra definition by adding manual shading. This technique can provide up to 90% retention with just one procedure!

Enroll now!
Not sure which microblade is right for you?
Give them all a try with our Sampler Pack!
Each kit contains two of each fundamental configuration: 9 Classic, 14 Curved, U Needle, and 19 Shader. Perfect for new artists looking to test and try, and for experienced artists and trainers who want to add more tools to their professional kit.

Leave a comment
This site is protected by hCaptcha and the hCaptcha Privacy Policy and Terms of Service apply.