Case Study: Manual Eyeliner Technique

In this case study, PRO Team Artist Ji from INKJI, shares how she combines her favorite eyeliner technique using a manual microblade to create a crisp, winged outline combined with machine techniques.
Ji Soon learned this technique from PMU Artist Mini, instructor of the Fundamentals of Eyeliner Tattooing course on The Collective, and it has quickly become her go-to technique. Keep reading to learn the benefits of this technique and how you can incorporate it into your eyeliner procedures.

Client's Goal
My client wears black liquid eyeliner every day and is looking to wake up effortlessly with a perfect winged eyeliner.
Client Skin Type
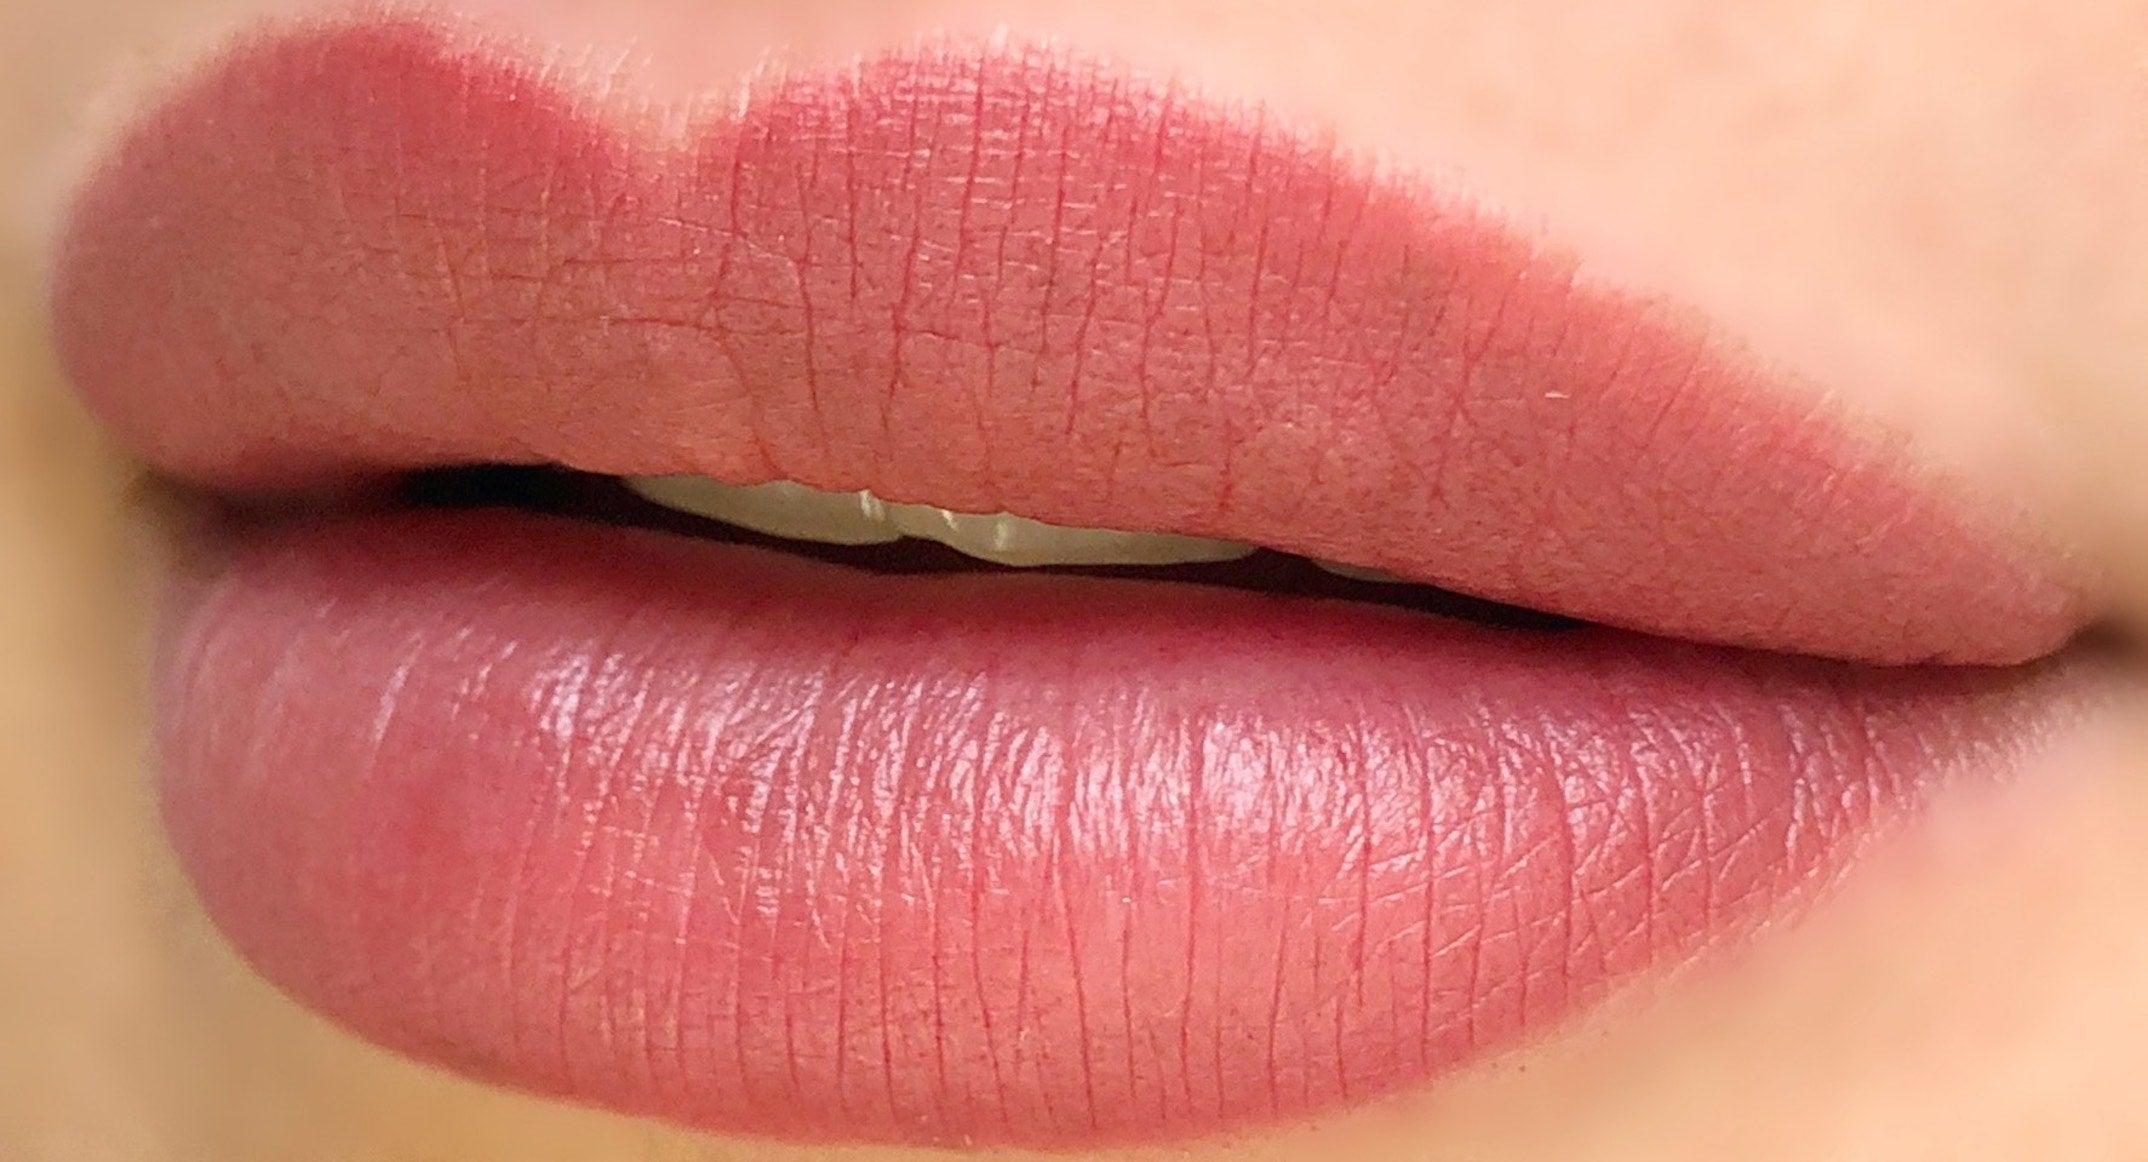
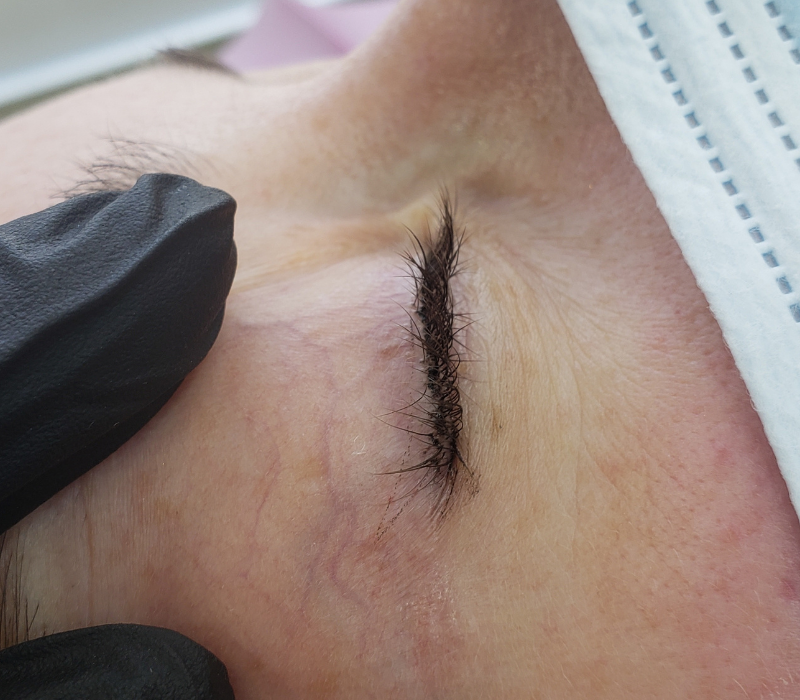 Visible veining on the client's eyelid
Her skin type was normal with freckles and no contraindications. It’s more transparent with visible veining on her eyelids.
I used to turn clients who had veiny lids away, as I was worried about pigment migration, however, once I learned how to adjust my technique when working on these clients I became confident to take these cases on.
Pro Tip: Pressure is one of the key players in pigment migration, so be aware and lighten your pressure. Work slowly and patiently. Slow down your hand speed and machine speed. Graze the tip of the needle on the surface of the skin and gradually build up the colour.
Pre-Care Advice
It is important to ensure your clients are not using eyelash serum for at least 6 months prior to an eyeliner tattooing procedure, and they should avoid it for 6 months after their procedure. Eyelash serum can cause the vein’s size around the eye to increase, which can impact ink retention.
Colour Selection
I ask my clients if they use pencil or liquid eyeliner because a pencil liner typically has a softer look, while liquid eyeliner is sharper, crisp and dark. Understanding this will give you an idea of what look they are desiring. Since she was used to wearing black liquid eyeliner, I knew she was looking for a dark, black final result.
This can be challenging, as many artists know, black eyeliner on its own tends to heal blue-ish or grey, as black is a very cool-toned colour and when implanted into lighter, cooler skin tone. Adding in a warm modifier is key. Adding warmth will help prevent the eyeliner from healing blue-ish/grey.
I find it very helpful to explain this to my clients as it helps ease any concerns they may have. Knowledge is power as an artist and explaining your process and reasoning is a great way to build confidence and trust with your client and gives them the reassurance they need.
For this client, I chose Perma Blend Eyeliner Black, which is a cool black carbon-based eyeliner & Perma Blend Orange Crush, which is a vivid orange pigment that is great for adding warmth without lightening the overall tone.

Perma Blend Eyeliner Black
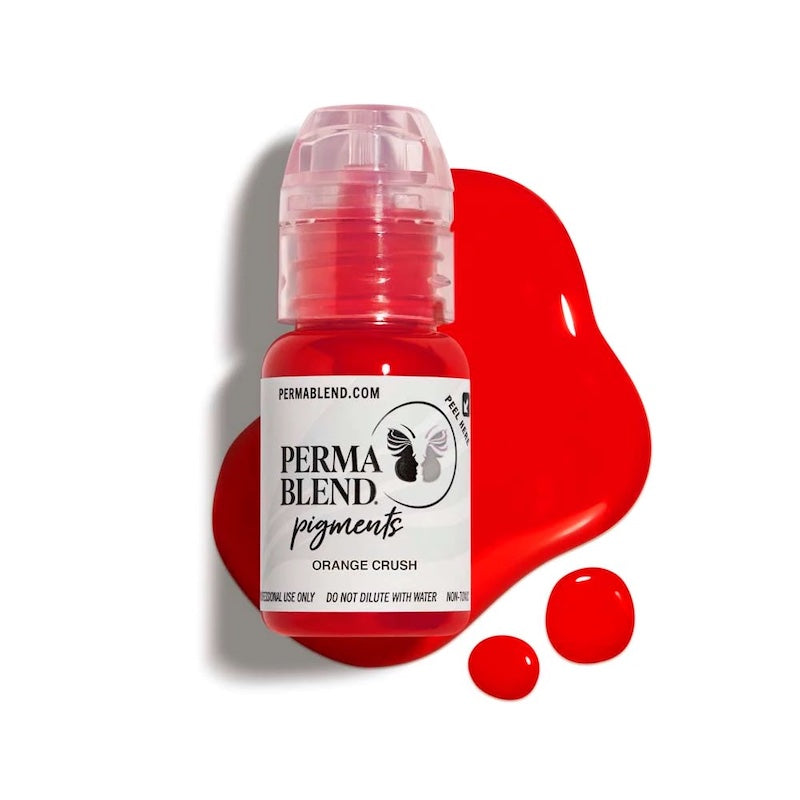
Perma Blend Orange Crush
Pre-Draw & Prep

Before
I use a black pre-draw pencil and don’t use any mapping tools as, many times, the client’s eye shape is not symmetrical. Here’s how I approach my eyeliner pre-draws:
Pro Tip: When drawing a winged eyeliner, it’s best to stay within the natural eye crease for the best long-term results. As your client ages, the areas around their eye will naturally sag, so if your wing is longer and outside of that crease, over time as they age, the wing too will sag.

Pro Silk Pre-Draw Pencil in Black
Once mapping is completed, I apply Zensa Numbing Cream and let it absorb for 15 minutes to numb the eyelid. Carefully remove the numbing cream to ensure your pre-draw stays in place. After the first pass and the skin is open, I use a mixture of Zensa & Sustaine (secondary numbing) for additional numbing throughout the procedure.
Plan of Action
Since discovering the manual technique to create a crisp winged outline, it is now my go-to. I find I am able to get better control using the manual technique because it allows me to adjust my pressure and create a delicate tail on the wing, plus, there’s less risk for migration as you're able to control the amount of pressure easier and use very little. This method is suitable for all clients, especially for more mature clients as their skin tends to be thinner, so it requires very little pressure.
For my manual technique, I use the Tina Davies 9 Classic Microblade, as it has a tighter configuration and a slanted tip, which means all needles touch the skin at once. Avoid any U-shaped blades for this technique.
I like how precise and easy to use the Tina Davies Micoblades are, not to mention, they come pre-packaged and assembled. Not only does this look nice to the client, but it also holds the utmost standards for hygiene.

Tina Davies 9 Classic Microblade
For the lash line & shading, I switched to a machine and chose the Tina Davies 0.25mm 1RL Precision Needle Cartridge because I prefer a long taper and a 0.20-0.25mm diameter for eyeliner procedures to ensure sharp tail work goes in smoothly.
Pro Tip: For the lash line, you can also use a bigger configuration, such as 0.35mm to reduce the time the needle is in the skin. Remember, less trauma = better results.

Tina Davies Precision 1 Round Liner Needle Cartridge
Tips & Techniques
I use a Mast Tour machine and power supply and set the speed between 4.2-4.8, depending on the area I’m working in. I use a slower speed on the outline accompanied with a slower hand speed. Once I’ve completed 2 passes, I will increase the speed to continue packing in the pigment, completing a total of 3 passes. Depending on the area I am working in, I’ll do a combination of whipping, shading, pendulum and outlining techniques.
Pro Tip: Adjust your hand speed to your machine speed. If your hand motion is slow and the machine's speed is also slow, you are able to build up the pigment in fewer passes and it’s more comfortable for your client. If your speed is too fast, you will have less pigment enter the skin and therefore, need more passes which causes more irritation and trauma to the skin.
Troubleshooting Tips: If you struggle with depositing pigment into the lash line, instead of using a whip-shading technique try an outline/dragging technique. The lash line tends to be more difficult for depositing pigment compared to the wing as the skin in this area is different. The lash line is a bit more rubbery, so in this area, I recommend doing an outline technique.

Manual Outline Technique: Working with your microblade at a 90-degree angle, with all needles touching the skin, slowly press the needles into the skin and lift up (flicking motion), continuing to work along the wings outline. Remember, slow and controlled, using very light pressure.
For my students, I recommend trying the manual outline technique if they're struggling with the outline using a machine. Sometimes it’s easier to use this manual technique, as you can control your pressure to ensure it’s very light. The key is to watch your pressure, as too much pressure is often the main reason migration can happen.
Pro Tip: The skin around the outer corner of the eye, where you draw the wing, has a higher chance of migration, so focus on lightening your pressure when working in this area.
I use my index finger & thumb plus the pinky of my other hand that is holding my machine to stretch. Working in small sections and adjusting as I move along. I adjust my angle & stretch depending on the area of the eye I am working on.


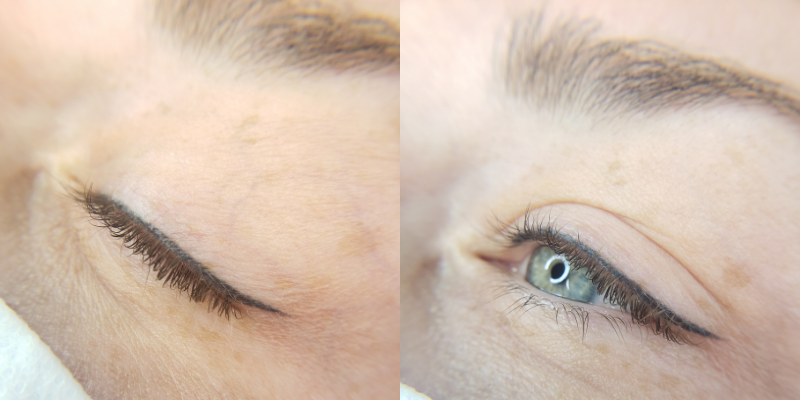
Immediately after eyeliner tattoo

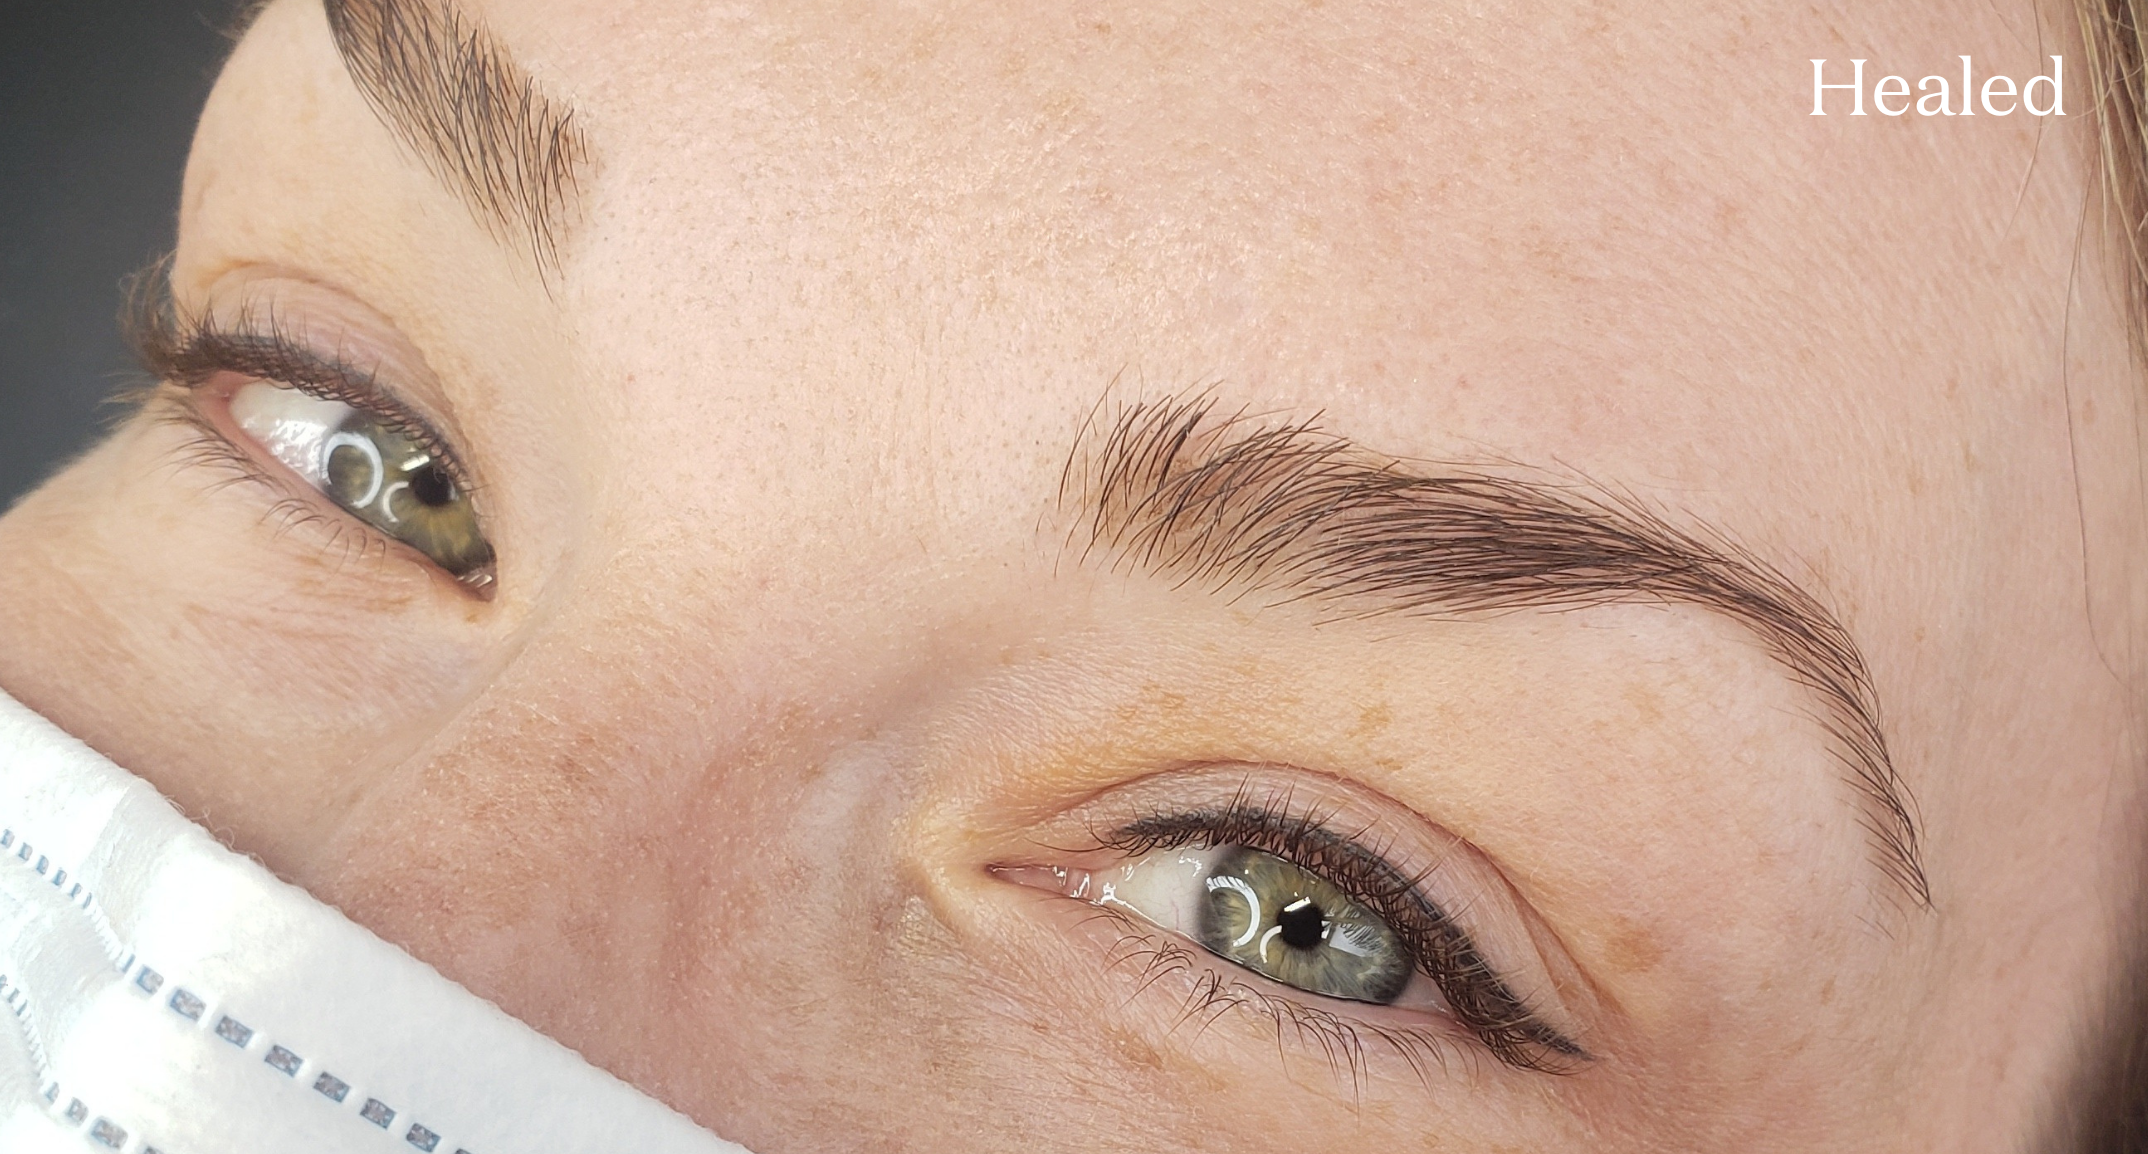
Healed

Healed eyeliner close-up 
Healed eyeliner
Touch-Up

Immediately after touch-up
My client was absolutely IN LOVE with her eyeliner when she came back for her touch-up appointment.
Upon touch-up, I needed to focus on perfecting the details. One of the tails healed just slightly little than the other, so I knew I would need to build up the colour on that side. I did one final pass to perfect any areas that may not have healed as strong, reinforcing the outline to ensure it is crisp. .
I used the same pigment mix, Eyeliner Black and Orange Crush, but i just added a little bit more Orange Crush upon touch-up to prevent cool healed results. I finished with booking her for an annual touch-up for maintenance.

Immediately after touch-up

Immediately after touch-up
Procedure Notes:
Age: 33
Fitzpatrick: 2
Skin type: Normal, transparent with veins on eyelids
Undertone: Neutral undertones with freckles
Pigments: Perma Blend Eyeliner Black + Perma Blend Orange Crush
Method: 1RL pendulum, dragging and outlining technique + Manual wing outline
Machine: Mast Tour
Needles: Tina Davies I Love Ink Precision Cartridge 0.25mm 1RL + Tina Davies 9 Classic Microblade
Artist Notes
Eyeliner is all about controlled pressure and precise stretching. Pressure is everything! Perfecting your pressure is so important when working around the eyes, it is one of the biggest factors when it comes to pigment migration.
One of the best ways to practice your pressure is to use a skin pad and pay close attention to the dots your needle makes. You want to make sure the diameter of your dots is consistent with the diameter of your needle. If your ink pixel dots are bigger than your needle diameter, this means you are pressing too hard and therefore going too deep. The finer your ink pixel, the better.
When I first started offering eyeliner, I did not do any winged liners because I was too afraid, but once I learned how to work slowly with my hand speed and machine speed, anything was possible. Continue learning and striving to find the best techniques for all different kinds of client types. Remember to practice, practice, practice, to perfect your techniques and designs. Artist and Fundamentals of Eyeliner online course instructor, Mini Na, from Beauté Academy taught me this technique and gave me the knowledge to continue finding and perfecting the skills needed to achieve gorgeous, healed eyeliner results for all my clients. Don’t be afraid to reach out to other artists if you are interested in learning more about their techniques.
I hope you enjoyed this case study and try this technique on a practice skin pad. Eyeliner can be easy if you remember these key tips. Comment below your favorite eyeliner techniques, I’d love to hear from you.
2 comments
Thanks for this some really useful tips and advice on eyeliner here. 🥰🥰
Paula
Beautiful 😍
Hulya Arif
Leave a comment
This site is protected by hCaptcha and the hCaptcha Privacy Policy and Terms of Service apply.