Artistry in Healing: 3 Stories of Empowerment
PMU is more than just a sharp brow or blushed lip. In the world of restorative artistry, Natalie Martin, Nancy Rodriguez, and Kyra McElroy shine as beacons of empowerment through their mastery of 3D areola tattooing. Their stories unfold narratives of resilience, dedication, and the transformative power of reclaiming identity after challenging cancer journeys. Get ready to explore the vibrant canvas where healing meets creativity.
Case Study #1: Natalie Martin
 @browbabe.natalie
Meet Natalie Martin, a passionate permanent makeup artist based in Covina, CA. Her journey began in 2020, driven by the desire for a flexible schedule to prioritize family time. As a Tina Davies PRO Team member since 2022, Natalie's dedication to her craft shines through. In 2021, she delved into 3D areola tattooing with the Ink Boutique Houston, paving the way for her to co-found the Monica Ann Foundation, a non-profit offering free services to cancer survivors and those affected by domestic violence or accidents. Let's take a closer look at the specifics of her case study.
Client Case & Considerations:
Natalie’s client underwent a double mastectomy and reconstructive surgery, leaving her with thin tissue and some scarring. Because of the compromised state of the skin, Natalie emphasized the importance of minimizing trauma in delicate areas for optimal healing
 Before
Client Goals:
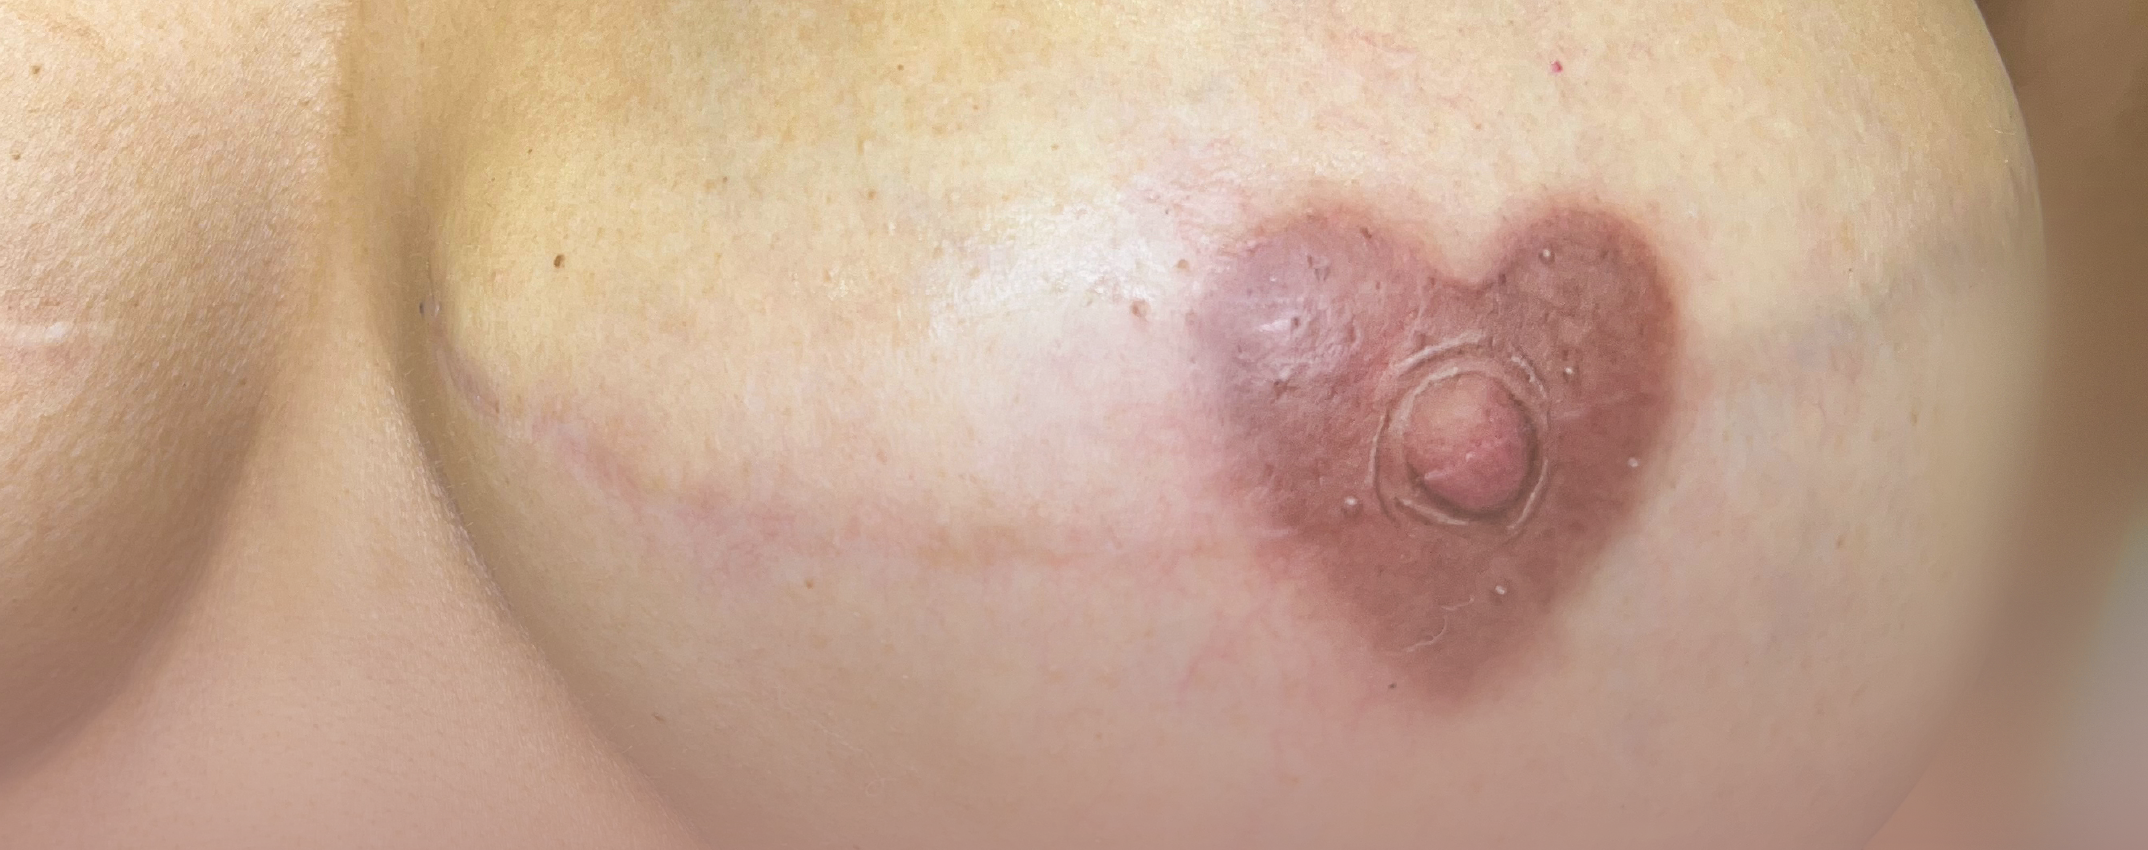
Her client sought natural-looking areolas replicating her native color, but requested a unique touch- heart-shaped areolas!
Skin Analysis:
This client had thin skin, is about a Fitzpatrick 4, and does have a noticeable scar through the center of the tattoo area on both sides.
Color Choice:
Carefully selecting colors using the Ink Boutique guide, Natalie sought to achieve a realistic tone. She incorporated several colors from World Famous Ink to complement the client's olive skin. Natalie was careful not to use warm browns, as too much warmth would result in orange-tone areolas over time.

In the end, a custom combination of Sahara, Indian Ink, and Warm Mink, with Prince Albert and Remberant Red for the nipple, Tobacco Dock for shadows and wrinkles, with White House for highlights all contributed to the 3D effect.
Design Approach:
To create symmetrical heart-shaped areolas, Natalie used heart-shaped stencils and mapping with string, offering the client various sizes to choose from. To enhance precision, Natalie marked a distinct 'T' on the client to visualize the central point for both nipples. Using this guide, she strategically positioned the heart-shaped stencil to achieve symmetrical areolas. Going a step further, Natalie hand-drew the nipples onto the hearts with finesse, using a fine-point marker to ensure meticulous detail in the final design.
 Pre-draw template
Procedure Notes:
Natalie initiated the process by meticulously outlining the nipple to establish a secure shape. Subsequently, she employed circular movements to apply a layering technique, ensuring a gradual and realistic shading of the areola.
Pro Tip: Exercise caution to avoid over-saturating the areola with color. Maintaining a soft and airy color intensity contributes to a more realistic appearance during the healing process.
Moving on to the nipple and shadowing, Natalie utilized the whipping technique, introducing a rosy color and creating nuanced shadows for dimensional depth.
Pro Tip: Craft a simulated light source to anticipate shadow placement. Utilizing opposition, strive for symmetrical and erect nipples. Practice by sketching circles with a light source to grasp the nuances of illusion.
Adding intricate details, including wrinkles, became the next step, by using an outline technique around the nipple while intentionally embracing some bits of randomness and imperfections to enhance the overall look of realism..
Finally, Natalie elevated the entire areola by incorporating highlights using white and ivory inks.
Pro Tip: Elevate the realism by strategically placing highlights. Applying white/ivory ink to the light source, Montgomery glands, and wrinkles enhances the three-dimensional effect, making the entire areola visually pop.
Tools:
Natalie used her Flux with a 3.0mm stroke for this client’s delicate skin, adjusting speeds for a natural effect. Needle choice included Tina Davies PIXL 3 Round Liner LT for details and PIXL 9 Curved Magnum LT for the areola.


Method:
To achieve a soft, watercolor effect for the areola, Natalie utilized circle movements, ensuring a delicate touch to avoid over-saturation. This approach resulted in a natural and beautifully healed appearance. For the nipple and intricate details, a 3RL whipping and stippling technique were employed, adding dimension and creating the illusion of a 3D and perky nipple.
Immediately After:
Post-procedure, the client experienced light redness and pinpoint bleeding, which was all expected to subside in the following days.

Healed Result:
Both Natalie and her client were both very happy with the overall healed result, even though one side did heal slightly lighter.

Touch-Up:
At the touch-up, Natalie took the opportunity to address the lightness on one side by adding just a bit more shading to those light areas and ensuring the overall look retained the natural details the client desired. In the end, the client ended up loving her new tattoos, making it a genuinely satisfying and successful experience all around.

Follow Natalie's journey on Instagram: @browbabe.natalie
Explore her non-profit work: @monicaann.foundation
Case Study #2: Nancy Rodriguez

@elite.pmu.studio
Nancy I. Rodriguez, a licensed professional specializing in several areas of micro-pigmentation specializes in lips, eyebrows, and eyeliner procedures, along with expertise in various paramedical procedures. As a body art licensed artist and certified educator, she proudly owns Elite Permanent Cosmetic and Tattoo Studio in Arkansas. A mother of three from Puerto Rico, Nancy discovered her passion in this fulfilling career, dedicating over three years to mastering every aspect of the craft. Let’s take a look into her case!
Client Case & Considerations:
Nancy's client is Teresa, a 40-year-old mother of two with gorgeous dark hair and green eyes. She shared that she couldn't feel anything in the treatment area, making numbing unnecessary. However, she did have alternate areas of sensitivity, adding an extra layer of complexity and pushing Nancy to carefully choose the right needles based on her understanding of different skin types.

Before
Client Goals:
Teresa is currently cancer-free post a double mastectomy, and sought restoration of confidence through areola tattooing. Nancy was moved by the desire to help Teresa regain what cancer had taken from her.
“She longs to reclaim what cancer has taken from her - confidence. She yearns to look at herself in the mirror and feel secure once again.”
Skin Analysis:
Teresa presented as Fitzpatrick 3 skintype with cool undertones. With no contraindications or red-flags at the time of the appointment, the pair were clear to proceed.
Color Choice:
In this particular case, Teresa came prepared and provided a photo of how her nipples looked before the double mastectomy, so the color selection was very easy and straight-forward.
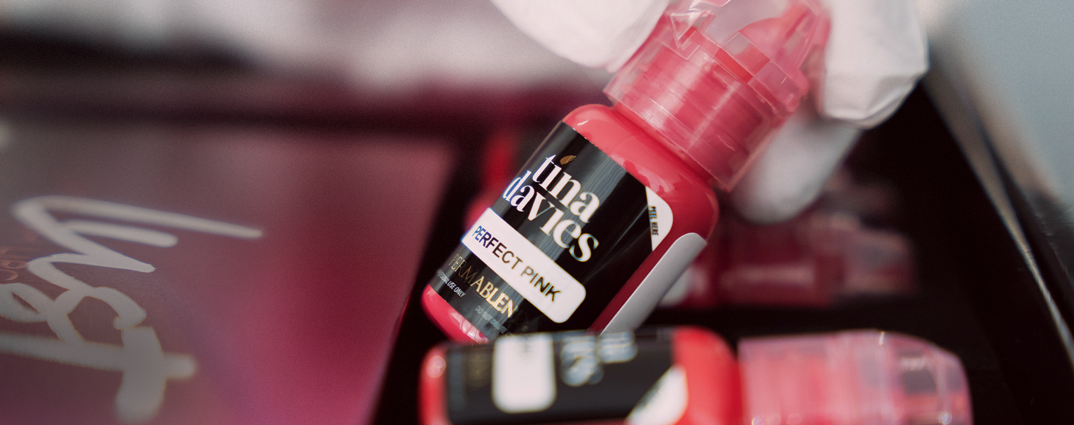
Nancy was able to choose perfect colors using Pink Mixer for the majority of the areola-nipple complex, Middle Mixer for the lowlights, and High White for the highlighted areas, all from the Perma Blend Areola Set.

Perma Blend Areola Set
Design Approach:
Flexing her artistic muscle, Nancy got a head start by sketching the night before the procedure, exploring various options for the overall look. After pinpointing the most realistic design, she showcased it to her client at the appointment. They then chose their colors and started mapping by using different points of Teresa's body for reference to achieve the most natural symmetry. The mapping focused around two circles representing the areola-nipple complex, a meticulous process that always includes client approval before the ink starts flowing.
 Pre-draw template
Procedure Notes:
For nipple creation, Nancy used a 3RL needle to define all the details, starting with a semi-circle and working outward for the desired shape with short whips, all while adjusting machine speed to a lower setting for soft layers.
Pro Tip: Less is always more! Create your lines softly so that you can build the perfect design and definition in layers.
Utilizing a 7 Curved Magnum for the areola, Nancy considered Teresa's sensitive skin. Proper needle usage, angle, speed, and pressure were crucial for minimizing trauma and ensuring a quality tattoo.
“Knowing how to use this type of needle before performing a procedure is the key to success. Remember that the proper use of magnum needles not only ensures the quality of the tattoo, but is also crucial for the health and safety of both the artist and the client.”
Nancy stressed the importance of controlling the speed, pressure, and angle as you work to ensure uniform and consistent shading. When reaching the edges of the areola, Nancy opts to speed up her hand movements, allowing for less pigment to be implanted in order to create a less defined edge.
Pro Tip: Do not clean the needle when switching from one color to another. The gradual combining of pigments is the key to blending the colors together seamlessly.
Nancy went on to use a 3RL for the creation of the Montgomery glands, and created crescent shapes with darker colors for a shadow effect with lighter colors for highlights. Nancy also made a point to stress that hygiene, particularly for cancer survivors, should always be highlighted as a top priority throughout the process.
Pro Tip: Do not try to create a uniform pattern, as it will not allow your design to look natural. Let your creativity guide you and simply create some crescents in different areas; but be careful not to overdo it, remember less is more.
Tools:
Nancy used her Bishop WAND Packer with 4.2mm stroke for its versatility in line work and color packing. She also used Tina Davies PIXL 3RL Needle Cartridge for nipple/details and PIXL 7 Curved Magnum Needle Cartridge for the areola.

Method:
Two essential techniques, outlining and shading, were used throughout the procedure. Outlining allowed for variation in small strokes and details, while shading accounted for the majority of even, gradual color application.
Immediately After:
Minimal swelling/ bleeding post-procedure indicated a job well done.

Healed Result & Touch-Up:
Nancy’s clients typically do not return for a touch-up for a full year, thanks to her use of top-tier products and fine pigment implantation techniques. At that time, Nancy will focus on maintaining that fresh look.
Follow Nancy's artistic journey on Instagram: @elite.pmu.studio
Discover more about her work: https://elitepermanentmakeupstudio.com/
Case Study #3: Kyra McElroy

@medinkflorida
Embark on the inspiring journey of Kyra McElroy, a former educator turned certified restorative medical tattoo artist who calls Bradenton, Florida her home. With certifications in 13 dermo-pigmentation techniques, Kyra's expertise ranges from 3D areola tattooing to scar camouflage and stretch mark revision. Kyra's commitment to cancer survivors is exemplified not only in her comprehensive services but also through her annual donation of areola tattoos, a heartfelt contribution to the emotional healing of deserving survivors. Delving into the details, let's explore her case study.
Client Case & Considerations:
Kyra’s client Amanda is a 47-year-old breast cancer survivor who posed a few specific challenges. Known for her love of tackling challenging cases, Kyra first sought out to draw attention away from the noticeable breast size differences—A cup on the left and C-D cup on the right. Beyond traditional, geometric measurements, Kyra relied on her instinct of the overall look of both breasts by looking away and then back again to asses the overall visual symmetry. This personalized approach ensured that the position of the areolas not only enhanced the end look but also celebrated Amanda's individuality. In this journey, Kyra's artistic touch brought both balance and beauty to Amanda's post-cancer experience.
Before
“At this stage, I ask myself questions such as:
- Does the current placement of the areolas enhance the surgical outcome or highlight differences?
- Are the areolas sitting naturally for her age?
- Does the placement accentuate or distract from the size differentiation?
- Are they too centered or looking up to the ceiling?
- Are they proportionate and in-line with what the client asked for?”
Client Goals:
Amanda expressed a simple desire for soft, natural-looking areolas to distract from her varying breast sizes. She initially wanted to start light in color.
Skin Analysis:
Amanda presented as a Fitzpatrick II with fair skin, susceptible to burning and occasional tanning, with a cool undertone adorned with freckles. Her breast cancer journey involved surgery, including DIEP Flap Reconstruction and radiation. The replacement of her natural areola and nipple with abdominal skin presented a color contrast challenge for Kyra, prompting thoughtful decisions on placement to achieve a harmonious look for both breasts.
In addition to radiation effects, which could potentially cause ash coloring if pigment selection wasn't precise, Kyra had to consider Amanda's diagnosed anemia. Mindful of the risk of bleeding, the first session required careful needle depth, emphasizing caution on the number of passes over the skin. Kyra's expertise navigated these complexities, ensuring a personalized and safe approach to Amanda's unique circumstances, all while preserving the artistry and empathy that define Kyra's practice.
Color Choice:
During the consultation, various shades were placed on her skin to observe how Amanda’s undertones influenced the pigment hues. Preferring peachy pink colors and favoring small to medium-sized areolas, Amanda hoped the tattoos would divert attention from the size difference between her left and right breast. Choosing very light areolas in the initial session, she later decided on a slightly darker shade during the touch-up.

Kyra used Perma Blend Cheeky, Perma Blend Pink Dermis, Perma Blend High White, and Perma Blend Middle Mixer. Dilution was adjusted for soft transitions. Amanda's cooler undertones guided the selection of brighter pigments.
Design Approach:
Kyra initiates every session by thoughtfully delving into her client's cancer journey, recognizing the significance of this milestone in their breast cancer recovery. Listening attentively to their stories forms a crucial connection, ensuring an enjoyable and memorable experience. The consultation covers details such as the number of surgeries, prognosis, radiation, and medication timeline.
Following this heartfelt discussion, Kyra outlines the session's three major steps. The first involves sizing and placement, where clients choose two areola sizes to "try on" from a circle template. Utilizing a clean digital caliper, Kyra meticulously measures from breast to breast and to the sternal notch, forming an equilateral triangle (Penn’s Triangle). For clients with significantly different breast sizes, Kyra employs a more artistic approach, making the process less scientific.
To ensure optimal placement, Kyra has clients shake out their shoulders or do a little hop, preventing any tension that could affect the tattoo’s position. She emphasizes that sizing and placement are paramount, allowing clients to make adjustments until they feel completely confident.
Moving to the second phase, Kyra assists in color selection by presenting laminated drawing cards featuring 12 different areolas. Clients point out two preferred colors, providing a guide for the color palette. Testing 2-4 areola colors on the breast, they adjust and mix until deciding on two final colors. Kyra then uses her professional judgment to select additional colors for the palette, including nipple color, white, and two tones of brown for shading and creating realistic details.
The third and final phase involves the actual tattooing, with Zensa numbing cream occasionally used as needed, ensuring a comfortable experience for her clients.

Procedure Notes:
Kyra began the tattooing process by shoveling the ink with quick, overlapping ovals, ensuring the outline of the nipple and areola would hold even if the drawn-on outline wore off. Employing the "backing off the needle" technique from Terry Lively, she swept the needles backward and in one direction, creating a softer edge.

3D Areola Tattooing by Terry Lively on The Collective
Pro Tip: Begin the areola shading close to the outline of the nipple and then blend outwards.
Once the base of the areola was complete, she incorporated whip-shading and pointillism to add three-dimensionality to the nipple. Using small compact micro-dots, she created a texture that mimics the realism of pores and skin overlapping in a natural nipple.
Pro Tip: Small compact micro-dots create texture. Micro-dot textures mimic the realism of pores and skin overlapping in a natural nipple.
Analyzing an imaginary light source from a specific point, she used her second darkest color to create a crescent moon-like shape around the base of the nipple. For the final touch, she outlined the nipple with the darkest pigment, leaving the top slightly open. Adding a small amount of white at the top created a "light" effect, suggesting light shining down from above the nipple for a 3D creation.
Once the nipple was complete, she added realistic details discussed with the client, such as Montgomery glands and soft shading.
Pro Tip: Always ask your client if they prefer realistic details before you add them. Do they like the look of wrinkles around the nipple? Do they like the presentation of Montgomery glands in the areola? Show them the difference between a nipple that has pointillism and one that has simply whip shading and adapt your techniques to the look they prefer.
Tools:
Kyra used the Microbeau Flux Mini in Champagne for its wireless and user-friendly features, confidently gripping the machine to ensure steady needle control. Setting the machine speed at 6.0V, she considered the client's anemia and thin skin, being cautious not to overwork the tissue. She transparently communicated to the client about the likelihood of needing the included touch-up session, taking into account the sensitivity of radiated skin and the underlying anemia.
For shading the areola, Kyra used the Peak Quartz 1207 Curved Magnum - 5.5mm Taper. When working on details within the areola and the nipple, she reached for a Peak Quartz 1205 Tight Round Liner - 5.5mm Taper.
Method:
Kyra's technique involved creating a soft, not overly brown, color palette to meet her client's preference for light, peachy, pink areolas. Her method included an "areola blushing" approach, where the color gracefully fades out with soft edging. This meticulous technique aimed to achieve a natural and aesthetically pleasing outcome, aligning with her client's desire for soft, natural-looking areolas.
Immediately After:

Immediately after the procedure, both Amanda and Kyra were delighted with the color and the intricate detailing of the 3D look. As discussed in the consultation, Kyra informed the client about the potential 25-40% fading that could occur after the first session. Emphasizing a two-session approach, Kyra offers the second session without additional charges. Her commitment is not only to achieve perfection in her work but also to encourage clients to return for their second session. While some clients may not necessarily require the second session, Kyra urges them to come back for final pictures and a thorough check of both her work and the healing process.
Healed Result:

About 8 weeks later, during Amanda's touch-up session, Kyra addressed the anticipated faded ink saturation by using the same color pigments with a slightly adjusted mixture ratio. The goal was to touch up specific areas and ensure consistent saturation across the entire areola and nipple. Additionally, Perma Blends Micro Mod Pigment Modifier in orange was employed to seamlessly blend Amanda's blue radiation markers into matching brown freckles.
Touch-up:

Immediately after touch-up
The touch-up session focused on slightly deeper penetration into the skin, with a quicker speed of 7V. Kyra retraced nipple details, enhanced highlighting, and pointillism for the final perfecting touches.
Follow Kyra on Instagram: @medinkflorida
Discover more about her work: https://medinkflorida.com/
As we wrap up this colorful journey, we see more than just ink on skin. Natalie, Nancy, and Kyra, through their craft, redefine confidence and celebrate the strength found after battling cancer. It's not just about the art; each is a tale of courage and self-discovery.
Stay tuned for more inspiring stories and the beautiful blend of art and recovery in the world of PMU!
Leave a comment
This site is protected by hCaptcha and the hCaptcha Privacy Policy and Terms of Service apply.